This page is still being constructed, but here’s the summary:
Pull-ups are a vertical pulling exercise. They help you climb and lift yourself, but they also help you lift things off the ground. They work the lats (the large muscles on your back that look like “wings”), the shoulders, the biceps, the forearms, and the abs.
(for Step 1 to 10)
Table of Contents
- Step 1: Leg Assisted Pull-ups, or
- Step 1B: 3-Second Negatives Pull-ups
- Step 2: Half Pull-ups
- Step 3: Pull-ups (Benchmark Skill)
- Step 4: Close Grip Pull-ups
- Step 5: Wide Grip Pull-ups
- Step 6: Archer Pull-ups
- Intermission
- Step 7: Three Finger Pull-ups
- Step 8: Two Finger Pull-ups
- Step 9: Towel Assisted One-Armed Pull-ups
- Step 10: Towel Assisted One-Armed Pull-up + Eccentrics
- Step 11: Half One-Armed Pull-ups
- Step 12: One-Armed Pull-ups (Hallmark Skill)
- Step 13+: Beyond the One-Armed Pull-up
- Ending Thoughts
Step 1: Leg Assisted Pull-ups, or
Step 1B: 3-Second Negatives Pull-ups
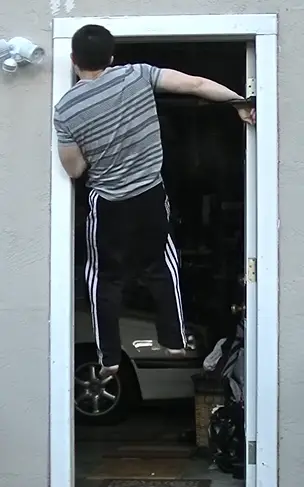
Step 2: Half Pull-ups
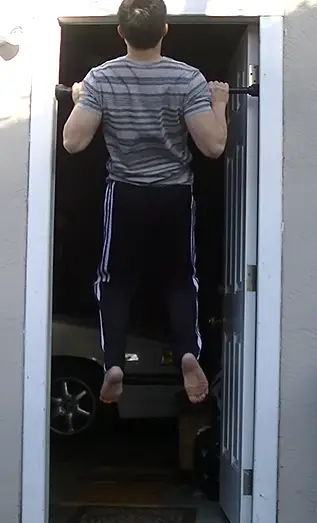
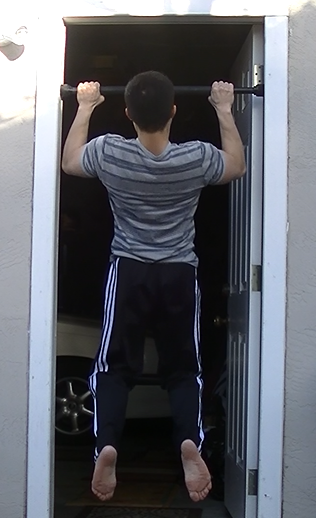
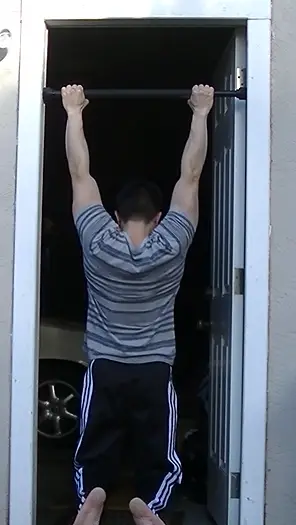
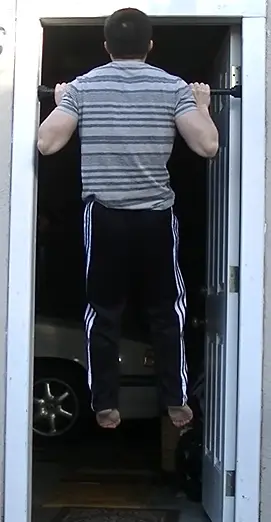
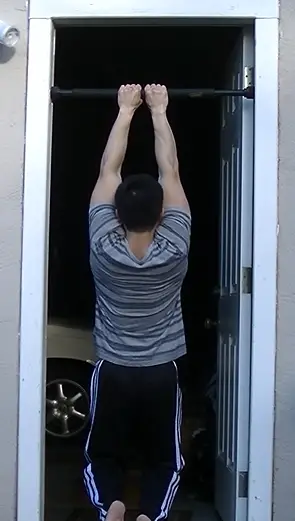
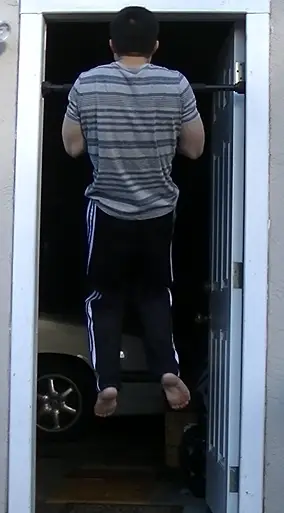
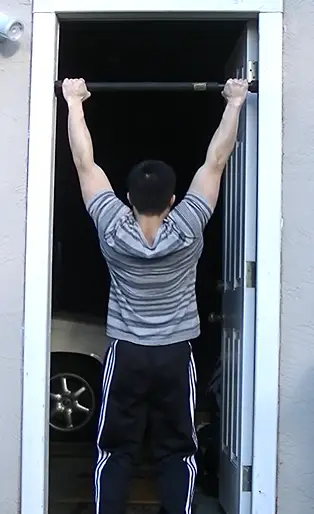
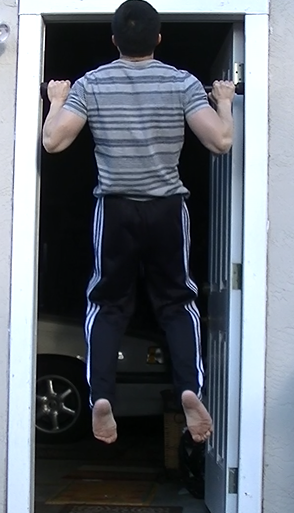
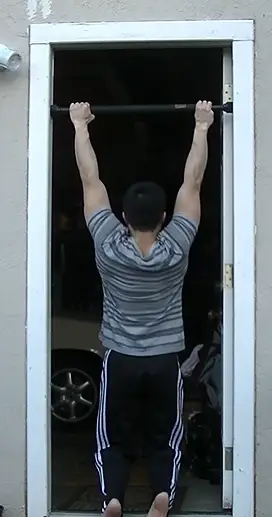
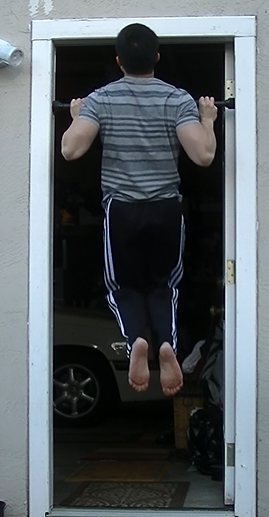
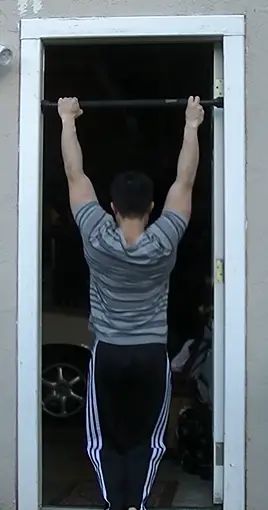
Step 3: Pull-ups (Benchmark Skill)
At last, a full pull-up! An iconic skill and perhaps the single most important upper body exercise you will do, period. You won’t start at the halfway now. You’re starting from the very bottom, at deadhang. Pull yourself up using your lats and shoulders until your chin is above the bar. Then let yourself down in a controlled fashion. That’s 1 rep.
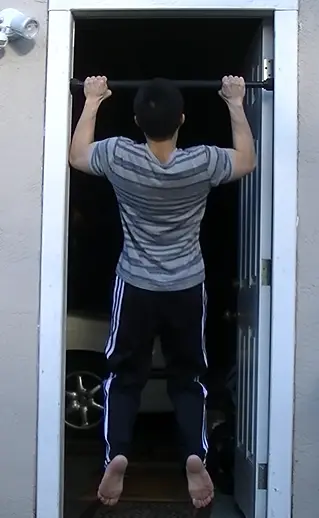
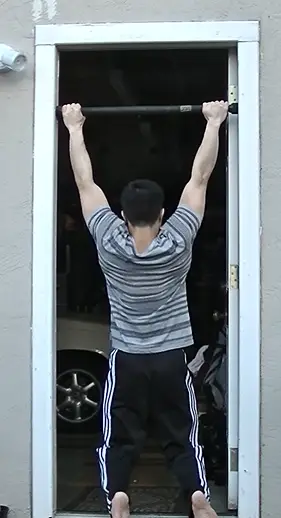
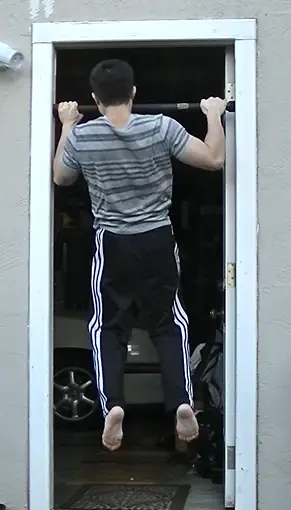
Step 4: Close Grip Pull-ups
Same concept, different focus. With hands closer together you’ll feel this more in the shoulders and biceps. You’ll still be working out the lats, however.
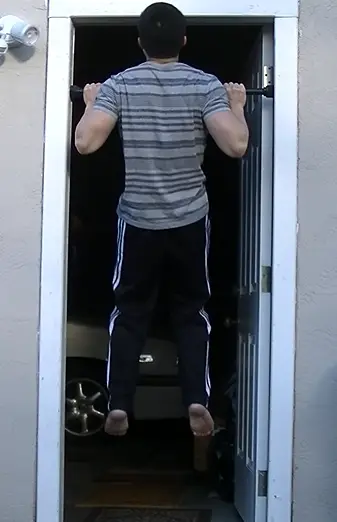
Step 5: Wide Grip Pull-ups
The opposite of the Close Grip Pull-ups! Now your hands are further than shoulder width apart. You’ll really feel it in the lats (and front of the shoulders) now.
Step 6: Archer Pull-ups
Archer Pull-ups are a strange deviant of Wide Grip Pull-ups. Archer moves (also available in Push-up flavor) are named because you keep one arm active as you push the other outwards. In the Archer Pull-up, you will pull with your active arm (in the images below, my left arm), as your archer arm brushes across the top of the pull-up bar.
The idea is that you work one side of your body more than the other for increased resistance (and thus, requiring more strength). They also look pretty neat, like you’re an archer… doing a pull-up. Don’t think too much about the name. Once you can hit 4×8 of these (2 sets focusing on each arm, a total of 4), you can continue to the next progression.
Intermission
At this point, you can:
- Work Towards the One-Armed Pullup. Continue from Step 7 to Step 12 to build strength for a One-Armed Pullup. I consider the one-armed pullup more of a party skill than a training tool, so if you want to continue improving and mastering the classic pull-up (a lifelong craft), then you can also…
- Add weight. With a weight vest, a weight belt, or a person who grabs and pulls you down a little bit, you can add resistence to Pull-ups, Wide Pull-ups, Archer Pull-ups, or any of the two-armed Pullups.
- Add reps. The Roam Strong system had you doing 4 sets x 10 reps. You can begin to add more reps by adding sets (5×10, 6×10) or reps (4×15, 4×20, or even 12/15/15/12a pyramid sets). My default for my current life is to add reps, since I often travel and don’t have access to weights to pull me down. I also believe many people’s elbows can sometimes get cranky training One-Armed Pull-ups — so longevity may support more two-armed varieties done with higher quality.
Step 7: Three Finger Pull-ups
At this point, you’ve gotten really good at two-armed pull-ups. Now, we are introducing unilateral load pull-ups. That is, we are going to be working one side more than the other in preparation for the ultimate pull-up skill: the One Armed Pull-up!
The first step toward landing the strength and skill required to perform the One-Armed Pull-up is reducing how much load one side can take. The Three Finger Pull-up disuses the pinky and thumb for the less active arm, cuing your body to utilize more of your other side. During your actual workout, alternate your focus on each arm. After you can hit 4×8 of these, continue to the next progression.
Step 8: Two Finger Pull-ups
To increase difficulty and force more focus on a dominant arm, remove another finger from the bar. Now you’re holding on with just your index finger and middle finger! When you can manage 4×8, you’re ready for the next progression.
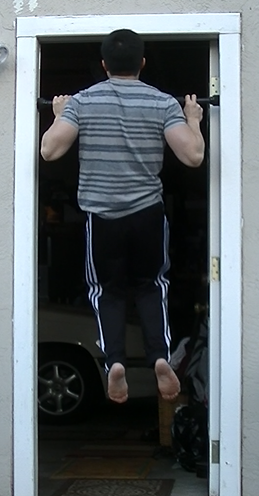
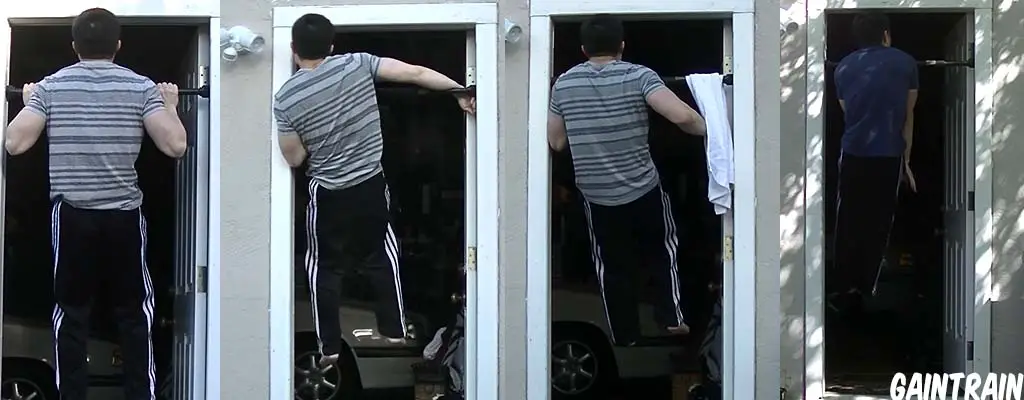
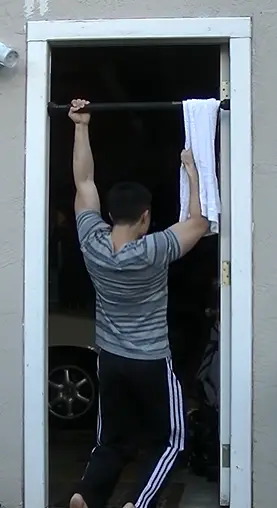
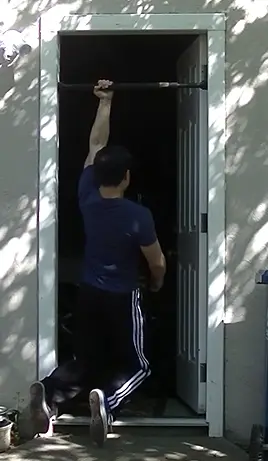
Step 9: Towel Assisted One-Armed Pull-ups
Now we remove one hand from the bar entirely! This time, find a towel, a resistance band, or anything that is both flexible and sturdy enough for you to pull your bodyweight on. I just use a sturdy hand towel. Throw it over the side with your less active arm. You’ll be pulling on it with one arm for the exercise!
The idea is that you can use less of your back muscles on your towel-grabbing arm, forcing more resistance onto your active arm. The lower you grab on the towel, the less force you can produce. Conversely, that adds more resistance to your active arm. Grabbing higher on the towel = easier. Grabbing lower on the towel = harder. Start with the towel high up, then lower with each successive workout.
When you can manage 4×8 (4 sets of 8 on each side… this is important)while your towel-holding hand is around waist height in the ending position, you are ready for the next progression.


(Note: in the images, I am doing a Chin-Up, or palm facing toward me. The same instructions apply to both chin-ups and pull-ups – do both, or either. Chin-ups have more bicep activation. Pull-ups have more shoulder activation)
To better work your active arm, grab the towel lower and lower each workout. When you can manage 4×8 while your towel-holding hand is around waist height in the ending position, you are ready for the next progression.
Step 10: Towel Assisted One-Armed Pull-up + Eccentrics
Now, you’ll be performing the same Towel Assisted OAPs… with a twist. Remember how we used eccentric movement (aka, a Negative Pull-up) to build the strength needed to do a normal Pull-up? The same principle applies to the One-Armed Pull-up. We will do a Towel Assisted OAP, but at the top, we will let go of the towel, and descend back to the starting position with just our active arm. Aim for at least 2 seconds of eccentric motion.
4×8 on each side? You’re ready to train the One-Armed Pull-up.
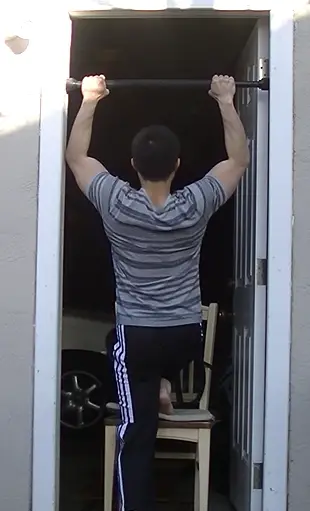
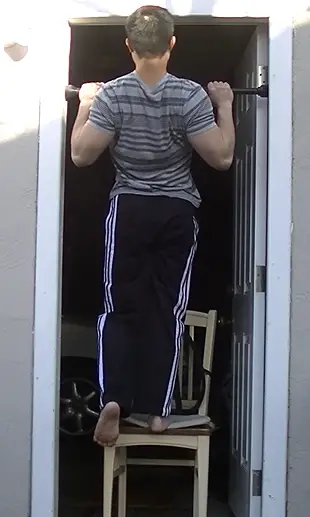
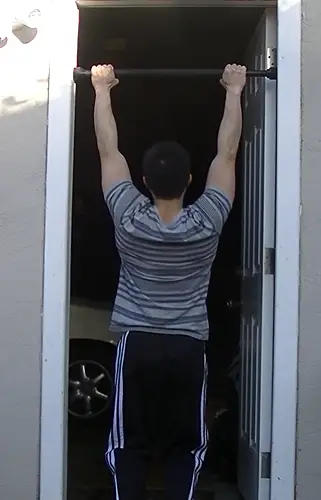
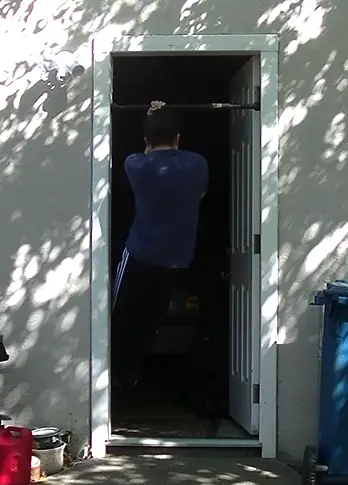
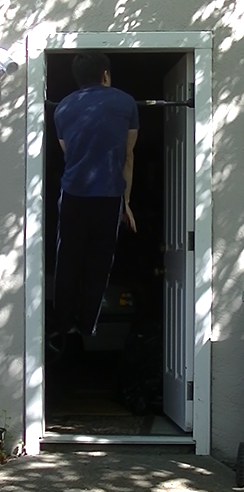
Step 11: Half One-Armed Pull-ups
Training wheels are off. Time to train a legendary skill.
The Half One-Armed Pull-up is a One-Armed Pull-up utilizing only the top half’s range of motion. That is, you begin in the “halfway” point of a normal Pull-up position. Each rep is just from the halfway point, to the top, back to halfway point. Check out the images!
The key to One-Armed Pull-ups is keeping tension in your entire body. Though you are mainly pulling with one arm and your back, you should be flexing your legs, your abs, and your hanging arm. Flex EVERYTHING. Tell your entire body that you need to move upward, not just your pulling arm. This is NOT the time to worry about keeping a totally straight body or pure deadhang. You need to train this technique a little dirty to make progress because you’re at that level of muscular strength where having 100% pure technique means you aren’t challenging your body enough to progress. Do not hurt yourself, but don’t be afraid to give it your all and struggle it up.
When you’re ready, check out the images and begin your training. When you can manage 4×8 on each side of the Half One-Armed Pull-ups, it is time for the ultimate challenge and final progression: Full ROM One-Armed Pull-ups.
Step 12: One-Armed Pull-ups (Hallmark Skill)
No more needs to be said. This is the hallmark skill, and the final challenge of the progression. If you walk into any commercial gym and look around, I can guarantee that almost no one there can do a one-armed pull-up. The skill is exceedingly rare as it requires incredible strength-to-size ratio. The more non-muscle weight you have, the harder the exercise, so you need to be STRONG or LEAN… really, BOTH. If you’ve been following along and can manage to 4×8 the other progressions, then I am confident you are ready for this challenge.
Technique: Going through the full range of motion on One-Armed Pull-ups requires some extra mindfulness towards technique. As full ROM single joint exercises go, this one can be outright dangerous if you aren’t prepared. You have the musculature and the prior pull-up technique from the other progressions, but single arm hangs add one element: rotation. You need to consciously rotate towards the bar as you pull-up or you will fail. During the exercise, tense your entire body and pull upwards while rotating into your active arm. This means you will try to turn counterclockwise when pulling with your left arm, and turn clockwise when pulling with your right arm. If you don’t, you’ll be spinning around as you pull-up, adding a dangerous element to an already difficult skill.
Get a hang of the feeling in the starting position, the halfway position, and the ending position. Put both hands on the bar, and let go. Perform an eccentric at the 3 positions, and feel out how to master the exercise. Visualize yourself doing it. Imagine how your muscle will tense. This is the most difficult skill that I highlight in the Roam Strong Workout progressions across ALL exercises and will likely be the final one to conquer, so you need to go all out on it.
WARNING: I do NOT do full deadhangs on One-Armed Pull-ups, nor do I lock out my elbows (i.e. I don’t keep them perfectly straight in the starting position). This is primarily a JOINT PROTECTION protocol due to the amount of resistance pouring through your active arm and back right now. By doing so, I’ve prevented elbow tendinitis, a common tendon inflammatory response to people who workout a lot, especially on pull-up bars. If you progressed following the Roam Strong Workout System, you could deadhang if you want since we’ve progressively built up your pull-up strength to be prepared for this load… but be mindful of your shoulder joint and elbow joint. If you feel a lot of non-muscular pain, don’t do a total deadhang. Listen to your body; it can tell you more than I can now.
Step 13+: Beyond the One-Armed Pull-up
If you’ve made it this far… then I have no words. Not even I can do 4×10 on each arm for One-Armed Pull-ups! Now, despite not hitting my 4×10 on One-Armed Pull-ups, I do know of some extra progression options once you’ve mastered it (or subsidiary exercises that you can perform in lieu of it).
- Weighted Pull-ups: no more unilateral exercise! Wear a backpack on the front of your body filled with weights (wearing on your back messed up technique and balance), or have someone grab onto you as you pull-up. When I do weighted pull-ups, I use a Spud Inc. Dip Belt and lace the chain through the plates. You can also wear a weighted vest/ankle weights but those are limited in how much weight you can add. From step 8
- Weighted One-Armed Pull-ups: I’ve never attempted this before since I have enough difficulty as is on unweighted One-Armed Pull-ups. You’ve graduated beyond me if you do these.
- High-Rep Pull-ups and High-Rep Wide Pull-ups: If you’ve no access to weights, a killer body can be crafted by repping. When I have no weights or gym access (aka, I’m traveling), I often go for higher reps of standard pull-ups. See “Intermission” on this page for more details.
Ending Thoughts
Pull-ups are my favorite exercise, period. They are immensely fun, incredibly functional, work out your entire upper body (and have some of the highest lower rectus abdominis activation of any exercise), and create a strength platform that lets you enjoy life to its fullest. They belong in every fitness program, and every athlete, programmer, mom, and apple picker has purpose to pursue them.
Pull-ups for life.
10 replies on “The Pull-up – Tutorial and Progressions”
I saw that you alternate the workouts. Why? I understand that muscle need time to recover but as mentioned, these workouts tend to use most of your muscles anyway so can you do the full list of workouts on the same day 3 times a week?
That’s true – they do use all your muscles. But they don’t use them at the same levels of intensity.
While handstand push-up progression/shoulder press (a vertical push movement) does use triceps, it will not hit them as hard as push-up progression/bench press (a horizontal push movement). The converse is true regarding use of shoulders.
If I gave a numerical intensity of each body part (from 1 to 10, 10 being max), it’d look like:
• Handstand Push-ups – 10 (Shoulders), 5-6 (Triceps), 1-2 (Chest)
• Push-ups: 9-10 (Triceps), 8 (Chest), 4-5 (Shoulders)
You could do the full list of exercises every workout, but I’d wager you’d see fewer improvements. One exception: if you do all the same exercises – BUT you alternate what you start with – then maybe it could work.
For example:
Workout A-
HSPU, Pull-ups, Squats, Leg Raises, Push-ups, Planks
Workout B –
Pull-ups, Squats, Leg Raises, HSPU, Planks, Push-ups
Or something like that. Though as I type it out, it starts to look a little ridiculous.
Could I do pull ups with workout A and then chin ups with workout B without over training?
I’d like to believe so. One-limb movements can be a little taxing on the joints/tendons/ligaments if they haven’t adapted. If you really want those extra pullups/chinups, I’d likely:
1) Focus one exercise on reps (e.g. you stay on pull-ups – instead of progressing further), and
2) Focus the other exercise on progressions 4×8 (e.g. chinup progressions).
Best of both worlds – without over-straining the joints. Just make sure you listen to your body. If you feel joint pain, dial it back a bit.
Love this website! I have a question about the exercises that place more emphasis on one side but still stress the other side, such as the three-finger pull-up.
Do you favor one side per workout and then switch to the other side for the next workout? Or, do you focus on both sides for every workout? If you focus on both sides for every workout, that would double the number of sets and reps and make the workout a lot longer.
I hope that question makes sense. Thanks!
Good question. You’d have to do 4×8 for each side – and yep, that does make the workout longer. I normally recommend for trainees to do one set of unilateral, wait 10 seconds, then do the other set of unilateral exercise.
So for a one-armed pushup – set#, arm used, rest period length before next set:
1) Set 1 (Right Arm), 10 secs
2) Set 1 (Left Arm), 2-3 mins
3) Set 2 (Right Arm), 10 secs
4) Set 2 (Left Arm), 2-3 mins
Repeat until Set 4’s left arm is done.
I’d recommend putting in that extra time to master unilateral training. Assuming your extra set takes you about a minute to do, it’s adding about 5 minutes to your workout for that day. Not too shabby.
The alternative is replacement with weighted equivalents (e.g. weighted pushups instead of working towards one-armed pushups) if your primary concern is muscle activation and strength gain. This would remove the “extra set”. But like I said, it’s not too much extra time, and I think you’ll be thankful you stuck with it.
Dear Aaron,
I had the same question. You specify 2×8 on each arm for archer pull-ups, but what about three and two finger pull-ups, would you do 2×8 or 4×8 for each arm?
Also, are pull-ups and chin-ups separate exercises; would you do separate progressions or 4×4 pull-ups then 4×5 chins-ups?
I personally monitor them separately – but I’d have little problem with someone measuring them the same.
The program officially desires 2×8 for each arm on the two/three finger pullups (aka, 4 working sets). I typically would add AMRAP normal pullups/chinups at the very end of workout.
Good question – I will amend the original post to make that clearer.
Lats pull up (bar to chest or lower) is very hard to do.
Yep, chest-to-bar pull-ups are a beast. I contemplated them as their own progression, but I’ve noticed that by going through the current progressions (and throwing in an end-of-workout isometric hold) most people will naturally begin to develop the ability to get the chest to the bar.