Wall Handstand Push-up Progressions
The Wall Handstand Push-up is an integral part of RoamStrong’s workout program. You progress by completing increasingly challenging variants of the primary movement (vertical pushing). The progressions for the WHSPU are below.
Table of Contents
- What is a Wall Handstand Push-up?
- What Muscles Are Used in a Wall Handstand Push-up?
- Why Should I Do Wall Handstand Push-ups?
- Wall Handstand Push-up Technique
- Wall Handstand Push-up Progressions
- Step 1: Incline Pike Press
- Step 2: Pike Press(Benchmark Skill)
- Step 3: Diamond Pike Press
- Step 4: Decline Pike Press
- Step 5: Decline Diamond Pike Press
- Step 6: Bending Wall Handstand Push-up
- Step 7: Wall Handstand Push-up Negatives
- Step 8: Half Wall Handstand Push-up
- Step 9: Wall Handstand Push-up (Hallmark Skill)
- Step 10: Close Wall Handstand Push-up
- Step 11: Elevated Wall Handstand Push-up
- Ending Thoughts
What is a Wall Handstand Push-up?
The Wall Handstand Push-up (abbreviated as WHSPU, pronounced Wiss-Puu) is a vertical pushing, shoulder dominant exercise performed by loading your bodyweight onto your shoulders, lowering yourself, then pushing yourself back up.
What Muscles Are Used in a Wall Handstand Push-up?
This progression will strengthen your shoulders and triceps, while increasing stability through tension in the traps, lower back, lats, and legs. They are the best shoulder sculpting exercise using bodyweight. More importantly, you will learn a skill that never leaves you gymless. These are my shoulder exercise of choice when traveling.
Why Should I Do Wall Handstand Push-ups?
As an arm pushing exercise, WHSPUs gets compared to Push-ups. Here are some benefits:
- Bragging Rights: Most people cannot do a wall handstand push-up. It simply looks amazing, and gets your friends and family’s instant respect for your fitness
- Builds Shoulder Muscle: DVD programs won’t build your shoulders and upper body like WHSPUs will, nor will they give you functional lifting abilities. Speaking of functional…
- Strong Pushing: Lifting anything above your head requires shoulder strength and upper+lower body stability working in concert. WHSPUs strengthen all these exact muscles, in the same movement pattern. That is, muscle memory and the strength base you build doing Handstand Push-ups transitions into overhead lifting tasks like moving boxes into the rafters, lifting your kids up in the air, or carrying the love of your life above your head. These are the important things in life, right?
- Shoulder Health: Seems counterintuitive to work out your shoulders if you’re afraid of injury. But it’s true, resistance training improves pain and function of the shoulder, protecting them as you age. No matter if you’re 18 or 80, you want strong, functional shoulders and healthier joints. This exercise also strengthens and balances your shoulders since horizontal pushing, like Bench Press and Push-ups, only work the front of your shoulder. WHSPUs work all sides.
- Sculpts Your Body: Guys – this exercise helps bring out the elusive “v-taper” (where your shoulders are wide and waist is small) alongside pull-ups. Girls – you won’t get bulky doing these. You will only tone up your arms and shoulders.
Wall Handstand Push-up Technique
The progressions are all different, but a few basic guidelines remain:
- Feet: Feet are together. If at the WHSPU steps (Bending WHSPU to Elevated WHSPU), your feet don’t have to be together. This makes the exercise more difficult since there is less tension in your body. Dead weight is harder to move than taut weight.
- Arms: Form a straight line into the floor when extended.
- Fingers: Spread or together. Middle finger should be in line with your elbows.
- Head: In line with your spine for stability. Try not to tilt your head up or down too much. During the movement, it should move in line with your arms.
- Breath: Inhale at the top position. Hold your breath or inhale as you descend. Hold at the bottom position. Hold as you push up. Exhale at the top.
- This breathing technique allows you to produce more power. The extra pressure in your core keeps your abs and lower back safer and stronger. If doing more than 12 reps a set, you may find inhaling on descent and exhaling on push is more effective.
Wall Handstand Push-up Progressions
Choose a variant as a starting point using your best judgment. If you have not trained before, choose Step 1’s exercise.
Do 4 sets of 4 to 8 reps (what are sets and reps?). When you can do 4 sets of 8 reps (4×8), begin the next exercise in the progression. More info on the “4×4-8” for GainTrain’s Workout 1.
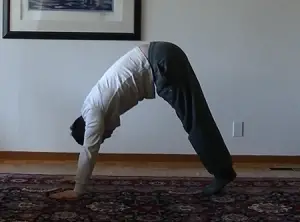
Step 1: Incline Pike Press
Hands should be shoulder width apart. Bend at your waist, like you’re a hinge made of your legs and your torso+arms. Lower your torso in a straight line, keeping your head in line with your arms.

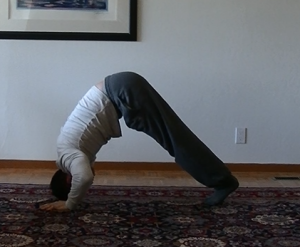
Step 2: Pike Press(Benchmark Skill)
The Pike Press forms the foundation of shoulder strength. Hinge down as far as you can, and keep the head+arms in line with your torso. An easy way to feel the correct starting position is to hold your arms extended overhead and bend at the waist until you touch the floor.
Step 3: Diamond Pike Press
“Diamond” position refers to your Index Fingers and Thumbs making a diamond. Technique is the same as the Pike Press, but you will feel more tension in your triceps and shoulders.
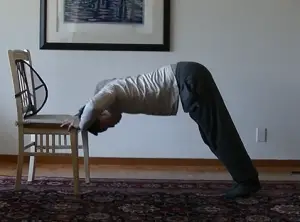
Step 4: Decline Pike Press
Find something sturdy to elevate your feet. This makes getting everything in line easier (to me!), but it makes the resistance harder.
Step 5: Decline Diamond Pike Press
Same as a Decline Pike Press, except with fingers in diamond form. This works your triceps and shoulders harder.
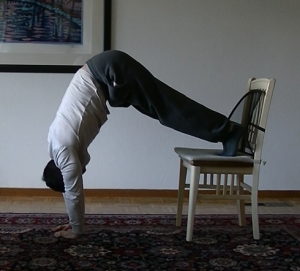
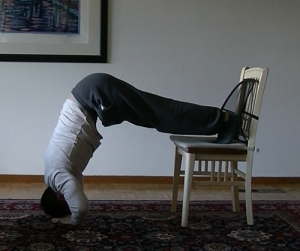
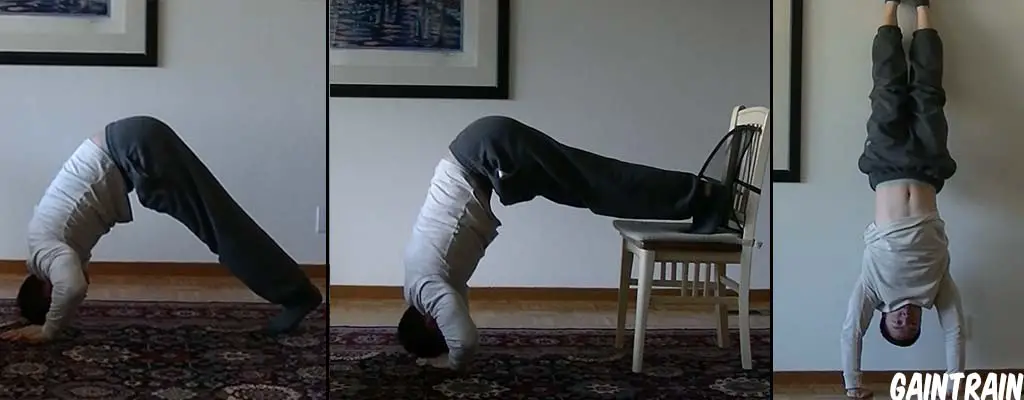
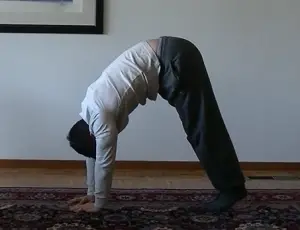
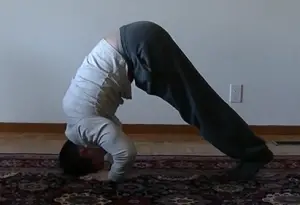
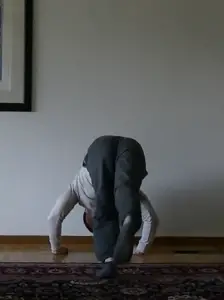
Step 6: Bending Wall Handstand Push-up
We’ve left “Pike” territory and entered “Handstand Push-up” territory. What marks the distinction is the position of your feet relative to your torso. If feet are below your torso in the top position, you are in “Pike” mode. If they are above your torso in the top position, you are in “Handstand” mode. For Bending Wall HSPUs, you will form either a 90 degree angle with the wall or a 45 degree angle (seen below). “Walk” your way up the wall until you are in position. Then press away.

Step 7: Wall Handstand Push-up Negatives
Here’s where things get interesting. There are two ways to get into position. You can walk your way up the wall entirely (like in the previous step). Or, you can “kick” yourself up to the wall. Being totally upside down is a unique experience, so practice holding this position for 20 seconds.
Your hands should be about 0 to 1 hand distance away from the wall. Find what is comfortable to you. Try to keep your body in a straight line. Don’t lean your head down to look at your hands/the floor. Just look straight ahead. Looking down curves your back, emphasizing different muscles and being a little more dangerous.
Performing a “negative” means you complete just one phase of the exercise. There are two phases: concentric (the pushing/pulling part of an exercise) and the eccentric (stabilization against force). Negatives are simply training the eccentric portion.
Pretend like you’re doing a Handstand Push-up, but go down slowly! I aim for a 3-to-5 second negative. At the bottom, instead of pushing up, you come down from the wall. That’s 1 rep.
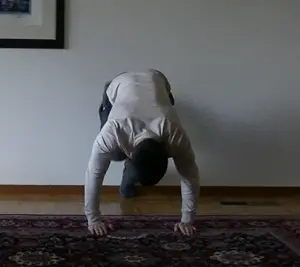
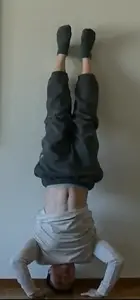
Step 8: Half Wall Handstand Push-up
Now we will train the first half of the range-of-motion (ROM) of the Handstand Push-up. Get into handstand position. Lower yourself until you are halfway to touching the floor with your head. Push back up.
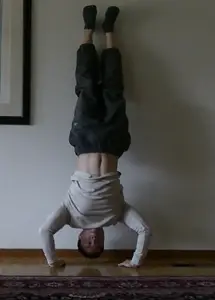
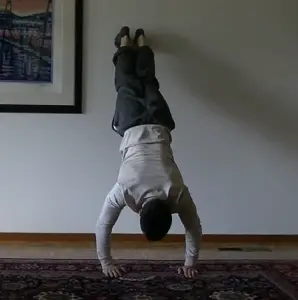
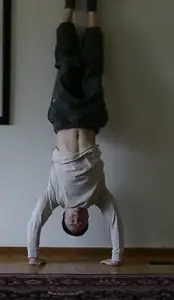
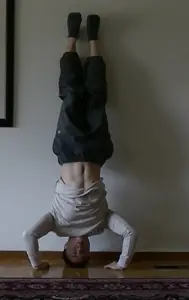
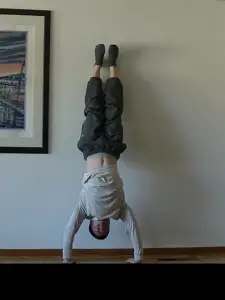
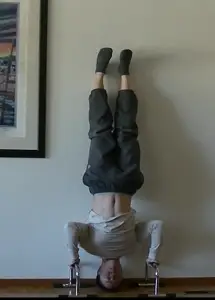
Step 9: Wall Handstand Push-up (Hallmark Skill)
The Wall Handstand Push-up, at last! Kick yourself up, then lower your body until your head touches the floor. Then push through your shoulders, triceps, and traps until you are back at Top Position.
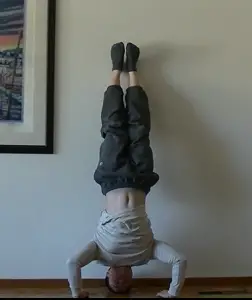
Step 10: Close Wall Handstand Push-up
Changing up your grip alters the intensity of the exercise. To focus more tension on the shoulders and triceps, move your hands in closer! Your arms will be in a Push-up width stance rather than a wider stance.
(Note: I did not make a “diamond”, but you can if desired)
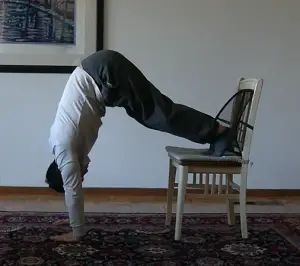
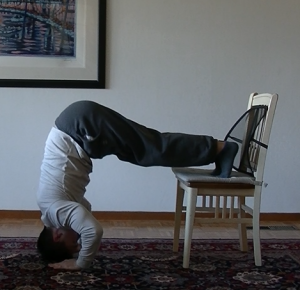
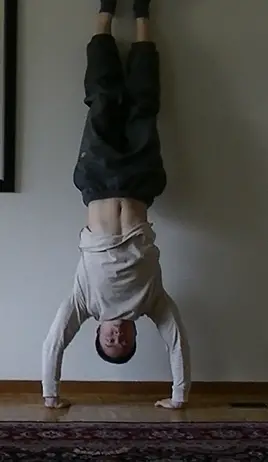
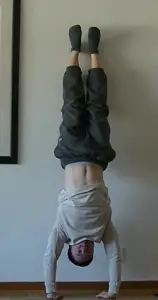
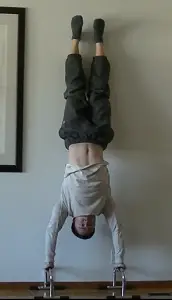
Step 11: Elevated Wall Handstand Push-up
So you’ve gotten to the point where WHSPUs are being repped? I remember slamming out 6 sets of 15 before I got the genius notion of adding height, and thus increasing the range of motion.
What entails? A much more difficult exercise that hits your muscles from all angles. Super strength is the end result.
Ending Thoughts
Combined with changing grip width (wide, close, diamond), you can hit every angle of your shoulders and upper body with Handstand Push-ups!
After you have mastered Elevated WHSPUs, take a breather because you are in incredible shape. You’re likely stronger than most of your general fitness friends and have a pretty rocking body.
If you’re not yet content in the size or strength category, you have options to keep progressing:
- First, is to increase your reps on Elevated WHSPUs and maintain your current strength and size, while keeping your joints strong and protected from age.
- Second, is to grab a weighted vest or ankle weights to make the exercise more difficult.
- If vastly increased strength is important, I recommend performing Overhead Presses with a barbell. You can only load so much lean mass onto a handstand push-up. Eventually, you will need more weight to tell your body to grow. Overhead Press is the key.
That does it for this progression! Any ideas, questions, or comments, leave them in the comments below.
6 replies on “The Wall Handstand Push-up – Tutorials and Progressions”
How hard is it to move from WHSPU to pure HSPU without the wall?
(For the record, I’m still only at decline pike press, but still curious nonetheless.)
Haha well, good news for you: when you can nail WHSPUs pretty easily without obscene form deviation, then your vertical pushing strength is ready for normal HSPUs.
However, you’ll definitely want to practice freeform handstands simultaneously. The balance part is what’s difficult for most,
Hey, on the wall push-ups full, is your butt on the wall too? Anterior shift?
My butt is not against the wall. The cue I use is to flex my glutes, slightly flex my abdominals, and shift my pelvis slightly posterior, but the end result is that my pelvis is slightly anteriorally tilted. It isn’t an issue to have a little anterior tilt and a little arch in the back while doing these.
If you have excessive arching/anterior pelvic tilt, I’d use the cues above to help a little. I know that my first handstand pushups gave my spine a slightly sharper pain than would be expected in any sort of strength training. At the time, I had weaker spinal erectors relative to my upper body. I’ve since covered this weakness with ab wheeling, deadlifts, and front/back levers. Anything to stabilize the spine will do.
Hi. I can hit the pike press just fine for 4×8, but I cannot do a 4×4 of diamond pike press. What should I do? I might have a bad form on the diamond pike press, but I think it’s pretty similar to my pike press form.
It’s hard to tell without a video, but some cues that normally help are:
1. Get your hands lower (closer to your chest) than a typical pike press
2. Lightly engage your lats and rotate your shoulder blade internally a little.
What’s your point of collapse when doing them? Any pain or spots where the exercise doesn’t feel smooth?