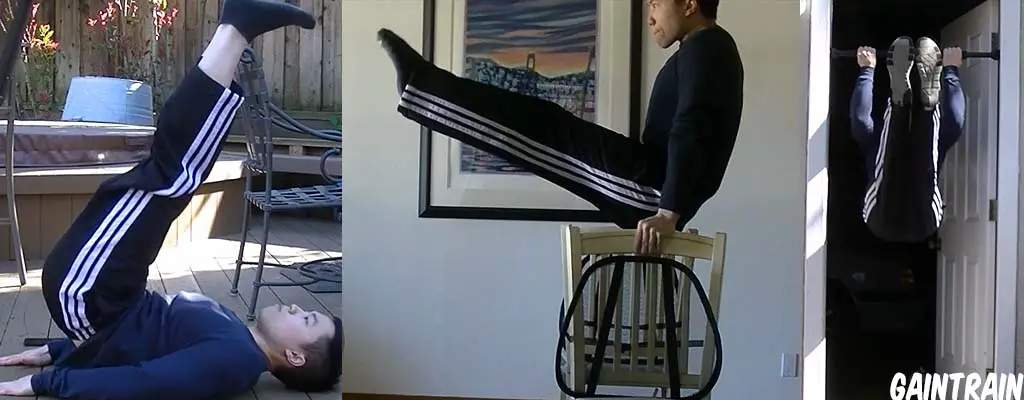
As outlined in RoamStrong’s workout program, you progress by completing increasingly more challenging variants of an exercise. Below are the progressions of the Hanging Leg Raise.
Table of Contents
- What is a Hanging Leg Raise?
- What Muscles Are Used in a Hanging Leg Raise?
- Why Should I Do Hanging Leg Raises?
- Hanging Leg Raise Progressions
- Step 1: Lying Knee Raise/Reverse Crunch
- Step 2: Lying Bent Leg Raise
- Step 3: Lying Straight Leg Raise
- Step 4: Pulse-Up
- Step 5: Lying Windshield Wiper
- Step 6: Parallel Knee Raise
- Step 7: Parallel Bent Leg Raise
- Step 8: Parallel Straight Leg Raise
- Step 9: Hanging Knee Raise
- Step 10: Hanging Bent Leg Raise
- Step 11: Hanging Straight Leg Raise (Benchmark Skill)
- Step 12: Hanging V-Raise
- Step 13: Hanging Fan Raise/Alternating V-Raises
- Step 14: Hanging Windshield Wiper (Hallmark Skill)
What is a Hanging Leg Raise?
The leg raise is a compound core exercise that strengthens the front and back side of your core. Perform a leg raise by hanging from a bar and moving your legs until they are parallel with the floor.
The movement will make your entire core very stable and strong. A stable core increases your ability to perform every possible movement, and armors your midsection with ab muscle. And, lets face it… everyone wants visible abs. This will get you there paired with a fat loss diet.
What Muscles Are Used in a Hanging Leg Raise?
Hanging Leg Raises and its variants primarily use the abs and obliques (the sides of your abs). It also strengthens the hips, lower back, and the legs as these exercise require some intense stabilization. Hanging progressions train the arms for static holds and test shoulder health.
Why Should I Do Hanging Leg Raises?
Abs. You will create a solid muscular foundation that translates into every exercise in existence. Your core is used in every single physical activity, even sitting. A strong core means a better life and better athletic function. Plus, abs. You want abs, period.
Hanging Leg Raise Progressions
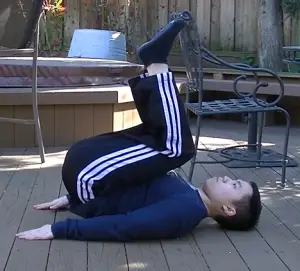
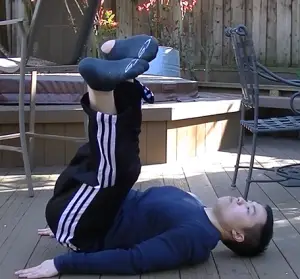
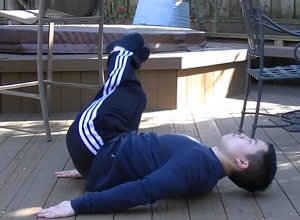
Step 1: Lying Knee Raise/Reverse Crunch
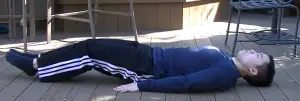
To perform the lying exercises, have your upper body flat on the floor. Your butt should be touching the ground, but your lower back might not be touching (depends on your spinal curvature and musculature). You should feel relaxed.
At the starting position, bring your knees towards your chest. Feel your hips hinging and your abs working to bring your knees up. Do not “roll” up with momentum. You should feel this exercise in your abs. Once in the bottom position, slowly let your lower body back down to start. That’s 1 rep.

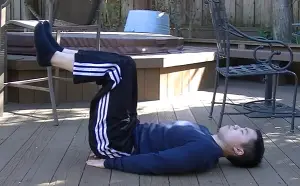
Step 2: Lying Bent Leg Raise
Place your legs flat (or flat-ish) on the floor. Lift your legs with your abs until they are perpendicular with your hips or further. Then slowly let them back down. That’s 1 rep.
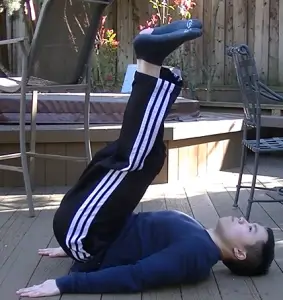
Step 3: Lying Straight Leg Raise
Keep your legs straight for this one. A helpful cue to keep your legs straight: point your toes, keep your feet together, and tense all muscles in your legs. Pull your legs off the ground with your lower abs* and continue to squeeze your abs until you hit a perpendicular angle with your hips. Let your legs gently fall back down. That’s 1 rep.
(Note: “lower abs” is a slight misnomer. Your abs are all one sheet of muscle! I find this cue helps people “command” muscle in that area more effectively)

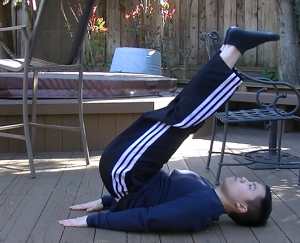
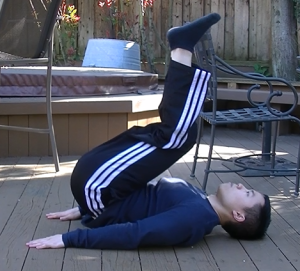
Step 4: Pulse-Up
This movement is slightly different from the others. You bring your legs up and keep them there as the starting position. From there, bring your legs towards your chest, then push through your heels and flex your lower abs. Return to the starting position. That’s 1 rep.
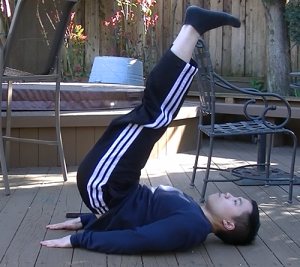
Step 5: Lying Windshield Wiper
This is the first exercise I introduce where you utilize rotational forces. This will hit your obliques a bit.
Begin my lying on the floor. Lift your legs and perform a Lying Straight Leg Raise. While at the “ending position” shift your legs’ weight to the left. Keep your upper body on the floor as best you can. When you’ve made a 45 degree angle with the floor, shift your weight back to the right until you make another 45 degree angle. Finally, bring your legs back to center and let them down. That’s 1 rep.

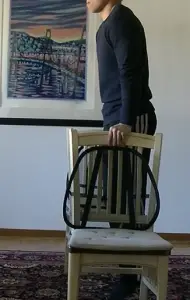
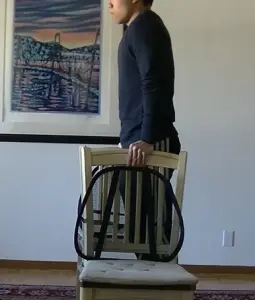
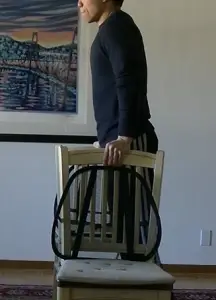
Step 6: Parallel Knee Raise
You’ve progressed past lying ab exercises. Well done! The next progressions deal with “Parallel” position. That is, your arms are by your sides and suspending you.
To perform the Parallel Knee Raise, place your arms onto two sturdy objects, with you in the middle. I use some sturdy dining chairs. Hold yourself up with arms extended all the way. If you’ve been following the GainTrain Workout, you should have no trouble with this. If not, I recommend sticking to the previous ab exercise until your arms are stronger.
From the starting position, raise your knees up to your chest. If your thighs pass parallel with the floor, I count it as a rep. Let your legs down. That’s 1 rep.
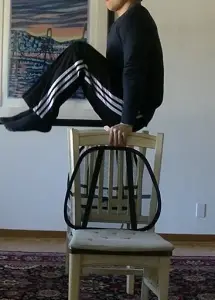
Step 7: Parallel Bent Leg Raise
Get into the starting position. Lift your legs with your abs and hips. After they pass parallel with the floor, let them down slowly. That’s 1 rep.
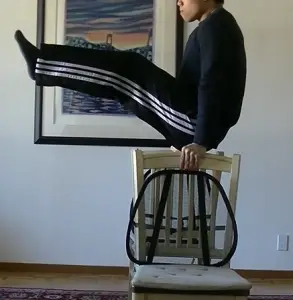
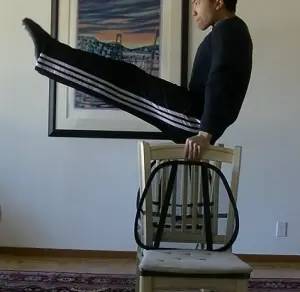
Step 8: Parallel Straight Leg Raise
Get into starting position. Lift your legs with your abs, keeping tension in your legs to keep them straight. A helpful cue: point your toes like an arrow. After your legs pass parallel, let them down slowly. That’s 1 rep.
Note: this looks badass.
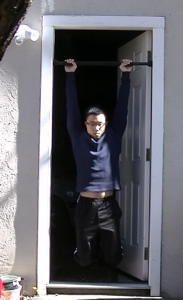
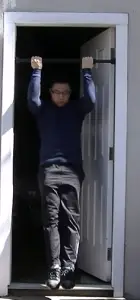
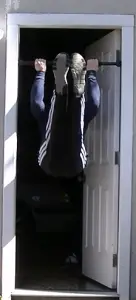
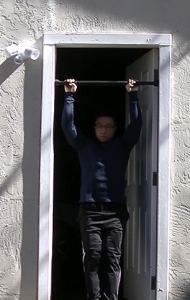
Step 9: Hanging Knee Raise
The Hanging Knee Raise begins the Hanging progressions. Hanging progressions put a lot of tension on your abs as you hinge your torso upwards. To start, grab the bar (pull-up or chin-up grip, it doesn’t matter) and hang. If you are comfortable hanging for 30 seconds, you are ready to begin training Hanging progressions. If not, train your hanging until you can hold for at least 30 seconds.
Get into starting position. Let your bodyweight dangle from your arms. Bring your knees up towards your chest. Squeeze your abs. Let your legs slowly descend back to starting position. That’s 1 rep.
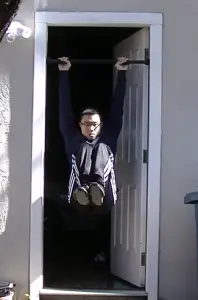
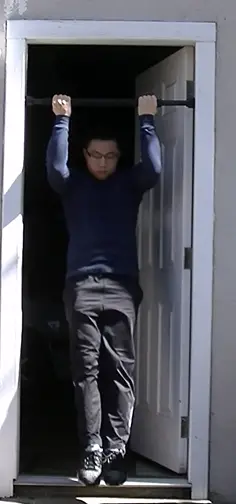
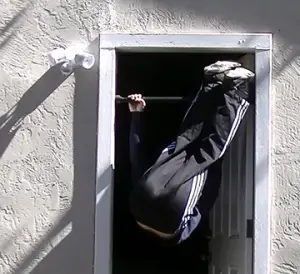
Step 10: Hanging Bent Leg Raise
Same as the Hanging Knee Raise, except you are doing this with legs extended. You are allowed to have a little bend in your knees. Bring your legs up with your abs – avoid swinging. Once your pass parallel with the floor, slowly let your legs back down to starting position. That’s 1 rep.
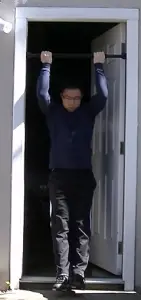
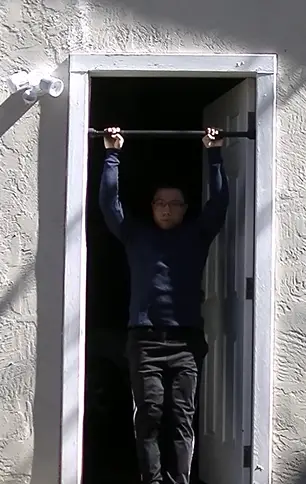
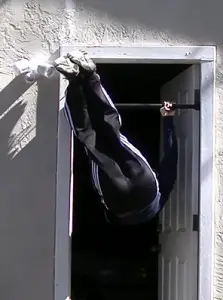
Step 11: Hanging Straight Leg Raise (Benchmark Skill)
Hopefully the other exercises have led you up to this point. The Hanging Straight Leg Raise is a testament to some serious core strength. Let’s apply those techniques you’ve felt building up to this point.
To keep your legs straight, keep your feet together and point with your toes. Move from Starting to Ending Position. That’s 1 rep.
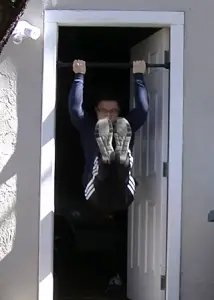
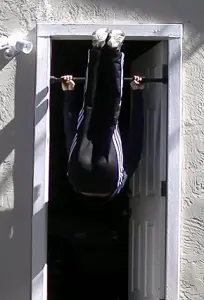
Step 12: Hanging V-Raise
A V-Raise refers to a Straight Leg Raise that continues past parallel until the shins touch the bar. This increased range of motion greatly increases the exercise’s difficulty. Don’t cheat by deliberately adding swinging momentum. Squeeze your abs to move your legs into the ending position. The extra effort improves your strength.
From starting position to ending position. That’s 1 rep.

Step 13: Hanging Fan Raise/Alternating V-Raises
This exercise is the same as Hanging V-Raises, except you shift your weight from middle, to left, to right. Touch the bar with your shins, then come back down to starting for every movement. You do not sweep your legs side-to-side. That’s a Windshield Wiper (the final step).
Every time your body comes back to neutral, that’s 1 rep.
Step 14: Hanging Windshield Wiper (Hallmark Skill)
The final step. This movement does serious work on the entirety of your abs. If you can do 4×8 on Step 13, you are ready to attempt.
This is like lying windshield wipers (all the way back at Step 5) except you’re holding the bar and hanging. Make no mistake, this is much tougher exercise. To complete a rep, lift your legs and perform a Hanging V-Raise. While still suspended, “wipe” your legs to the left, then to the right like a windshield wiper.
After sweeping from left to right (or right to left), return to neutral and let your legs down slowly. That’s 1 rep.
That does it for the Hanging Leg Raise progressions. When you hit 4 sets of 8 reps, you have a few options:
- Go for reps. This will keep your core in tip-top shape, function, and form.
- Use ankle weights. Adding just a little bit of weight at the ends of your feet drastically increases the exercise difficulty. I recommend going up by 2.5lbs (about 1-ish kg) every time you hit 4×8.
- For safety purposes, I do not recommend putting a dumbbell between your feet and doing leg raises of any kind. Too easy to damage things… or yourself/others/your dog.
- Ab Wheel Rollouts. These are wonderful for your core.
Think this is some difficult stuff? You’d be right. If you want to brag or simply request some help, leave some love in the comments below.
15 replies on “The Hanging Leg Raise – Tutorials and Progressions”
Hi.
Thank you for this. I dream of being able to do this 🙂
I will start with step 1. How much reps/steps/days do you advise before doing next step ?
I mean, if i train every day, how much reps, and after how much days can i try next step ?
Thanks a lot.
Ps: i do running, but my abs are weak.
I try to hit 4×8 (4 sets of 8 reps) before I’d progress. But if you’re feeling courageous, feel free to try doing them whenever you’d like!
I’d probably train every other day to give yourself time to recover, though, but I leave that decision up to you.
this hole in sock tho
Sock holes on fleek
My pull up bar is a little to short for optimal hanging leg raises.What should I do?
You might need to fold your legs back (like you’re doing a leg curl), begin the movement, then straighten out your leg after you’ve cleared your floor.
It’s ideal to find a spot to do this elsewhere for the benefits of hanging straight down and getting the full straight-legged ROM, but if you can’t, use what you’ve got.
After 4×8 parallel straight leg raises can I start on dragon flags instead of hanging leg raises because my pull up bar is to short for full r.o.m hanging leg raises?
If you’re at lack of pullup bar, then dragon flags could be a reasonable substitite if you can do ’em. I never wrote up a progressive guide for them and probably should. Good reminder.
A few notes:
1) Dragon flags are harder – so be prepared for that.
2) Dragon flags don’t get the and don’t get the benefit of hanging – which is great for your spine. Maybe introduce a solid minute (or more) of hanging with your legs tucked just enough to not hit the ground.
3) Dragon flags don’t have the same amount of hip extension ROM. This can be remedied with some hip extension based exercises – bodyweight glute raises (equipment free) and back extensions (requires a back extension widget) come to mind. I wouldn’t worry about progression for these. Just adding them for the ROM.
Hi, Can I ask why you change your grip from pull up grip when you perform the hanging knee raises to chin up grip when you perform the hanging bent leg raises and leg raises? Does the grip matter when performing these moves for hanging?
For hanging leg raise variants, do what’s most comfortable for you and your shoulders. The focus here is core engagements and full body tension. Feel free to mix it up.
Hi, is there any difference between “Hanging Leg Raise” and just “Leg Raise”? I ask because the main page notes one then the other in the Workout Summary section.
Good catch. There is a difference between (grounded) leg raises and hanging leg raises. On the main page, I sometimes refer to the whole series of progression as “leg raise progression” or “hanging leg raise progression”, but there is only one progression for the PBW.
Out of curiosity, which line are you referring to specifically?
I was just wondering if they were considered the same progression but on 2 different days across the weeks or if I was meant to look at a separate progression. It was confusing because for the rest I can understand the concept of “do this exercise at whatever stage you are able in its progression” but I didn’t know if you ware using two terms interchangeably for the same exercise.
Thank you somuch for this nice page! you are a true hero!
Can you comment on the problem of too short hamstrings for changing from Parallel Knee Raise to
Parallel Bent Leg Raise. I am almost unable to raise without having the knees bent quit a lot.
cheers
Hey Frank – you’ll want to introduce some mobility work that focuses on hamstrings after your workout. Google around for “hamstring stretches”, and do these after workout. You can choose between any variant of static stretching, dynamic stretching, mobility work, etc. What’s important is just going through some hamstring-focused movement, rather than the moves themselves.
A personal few favorites of mine are leg swings (front and lateral) and airplanes. You can find both in this video: https://www.youtube.com/watch?v=qQrqR0NBZ1E